
Hey everyone! As promised, today I’m going to explore a store-bought men’s blazer to see how it compares to the one I’m making right now. But first – A TEASER!!
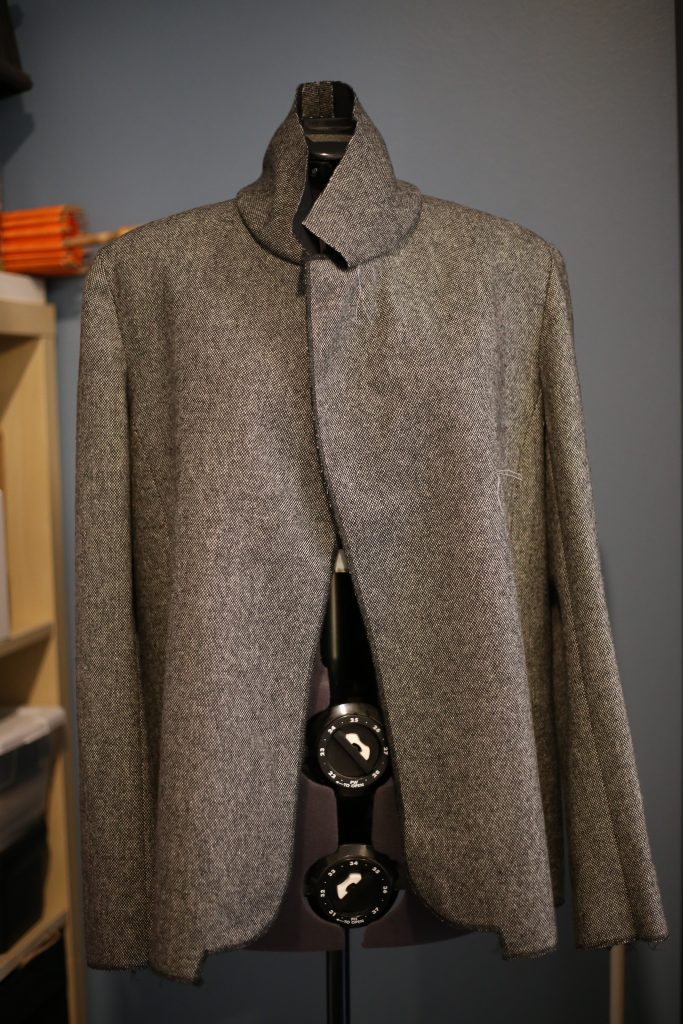
My McCall’s blazer is coming along swimmingly! (What does that mean and why did I use it just there….?!) This is the outer shell of the jacket, completed. The collar looks funny because this is the undercollar only – the top of the collar will be attached to the lining unit first, then the whole thing will be attached. The grey threads sticking out at the top of the garment are tailor’s tacks – note that it is a DUMB IDEA to use thread in a matching colour to your garment as tailor’s tacks, because you will constantly think they are stray threads and end up yanking them out accidentally. My bad. Red embroidery thread is on order…
So! Back to today’s topic of conversation: exploring the store-bought blazer. This is a mass-market, mid-quality blazer – the kind you might buy at your average suit store in a mall. I have no idea why it looks so dirty…I suspect some cats used it as a bed when I wasn’t looking.
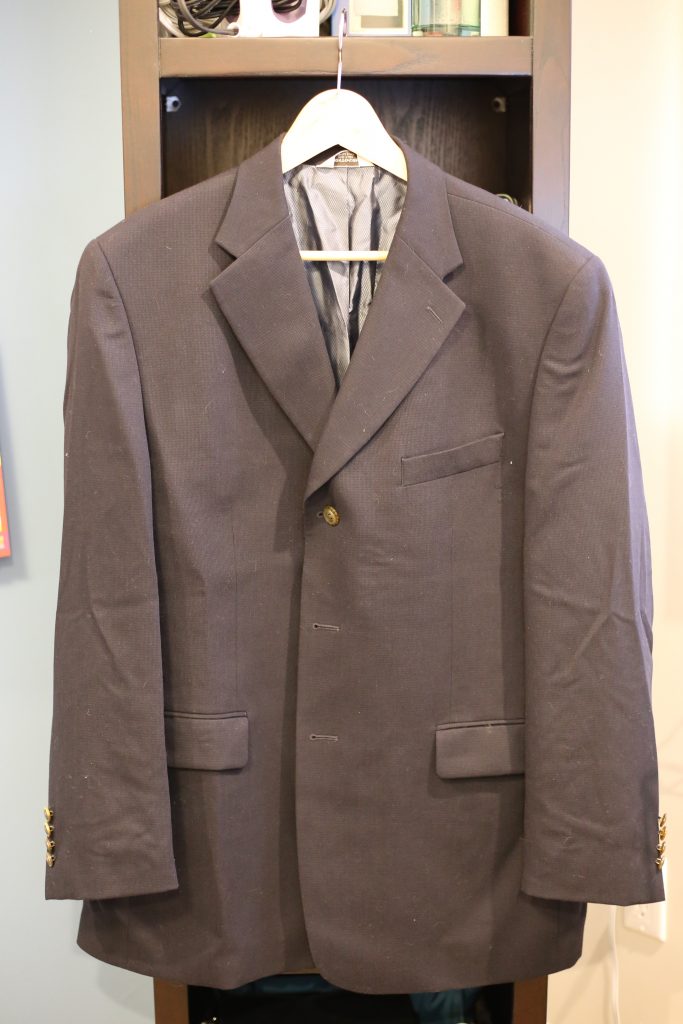
Other than the hair and wrinkles, it’s your pretty average suit jacket. Men’s blazers lap left over right, women’s usually right over left. This jacket has your standard notched collar:
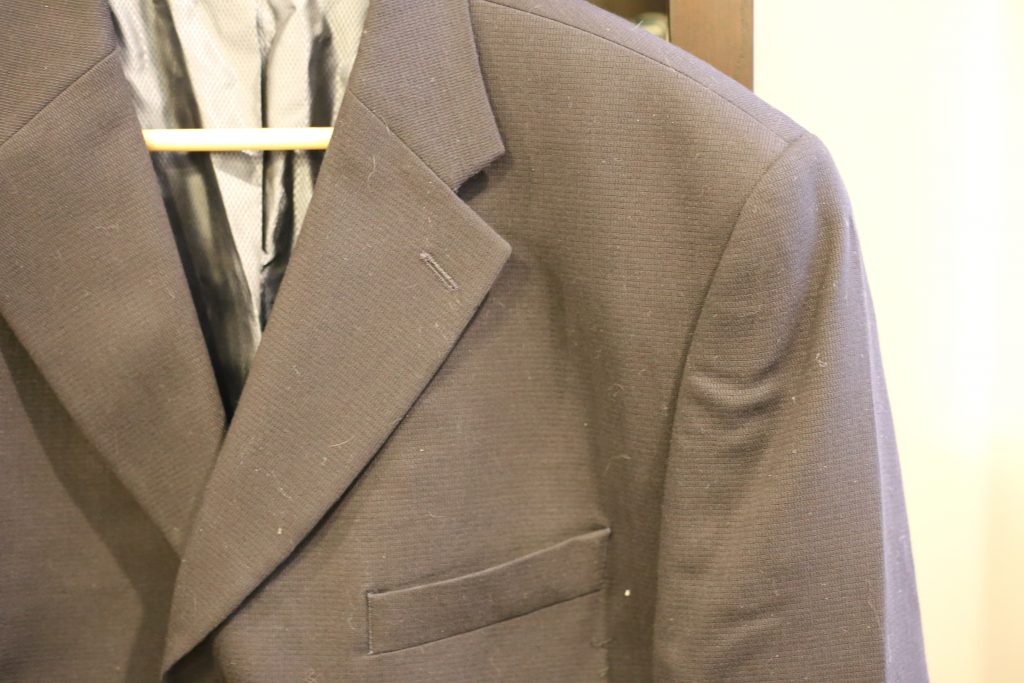
There’s also a lovely welt pocket at the chest. I decided to go easy on myself for my first blazer and not insert a welt pocket, but I have put welt pockets into a dress (post upcoming) and there are many posts on the internet about this technique! Craftsy has a double welt pocket tutorial here, and Colette has a single welt pocket tutorial here. I actually used the Colette tutorial when making my dress and they turned out really well, so I recommend this one! The thing that is scary for most people about welt pockets is that you actually have to slice a slit in your garment where you want the pocket – kind of a “no turning back” situation. But once you get that over with and wrap your head around the strange placement of the pieces, it’s really not that bad. Well-made welt pockets are a sign of a confident sewer, so do it!!
You can also see in the picture above the very clean lines on the notch collar. The construction of the collar can be a dead giveaway between a store-bought and a home-sewn garment so take your time on this step! (Come back to this picture and compare my notch collar to it once I’ve posted it – let me know if you think I did it justice.)
Next, a little look at the lower front of the jacket:
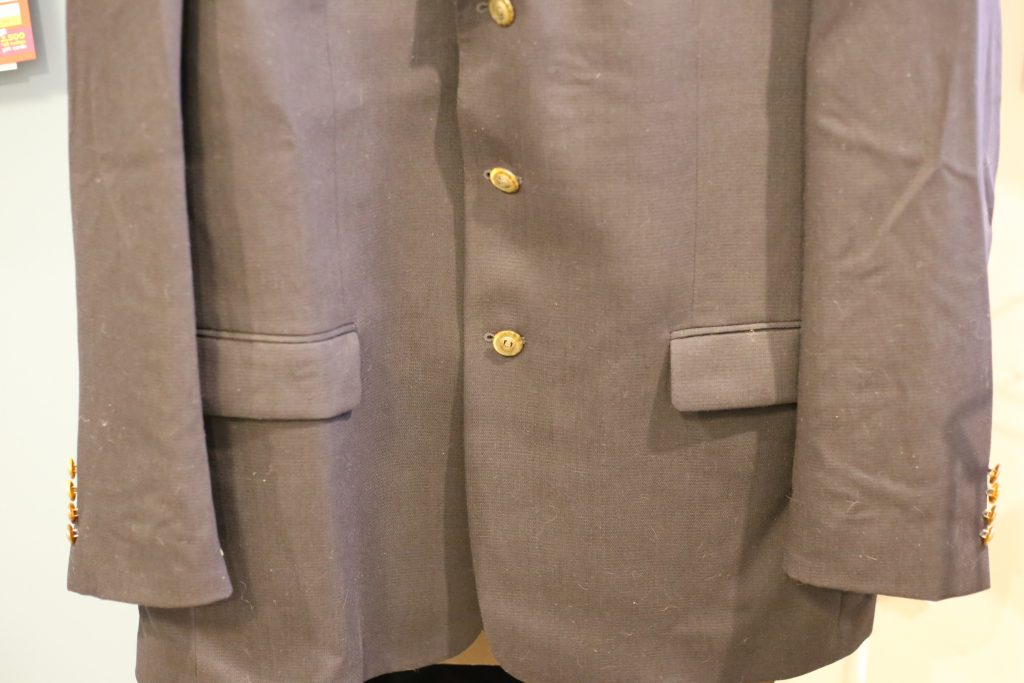
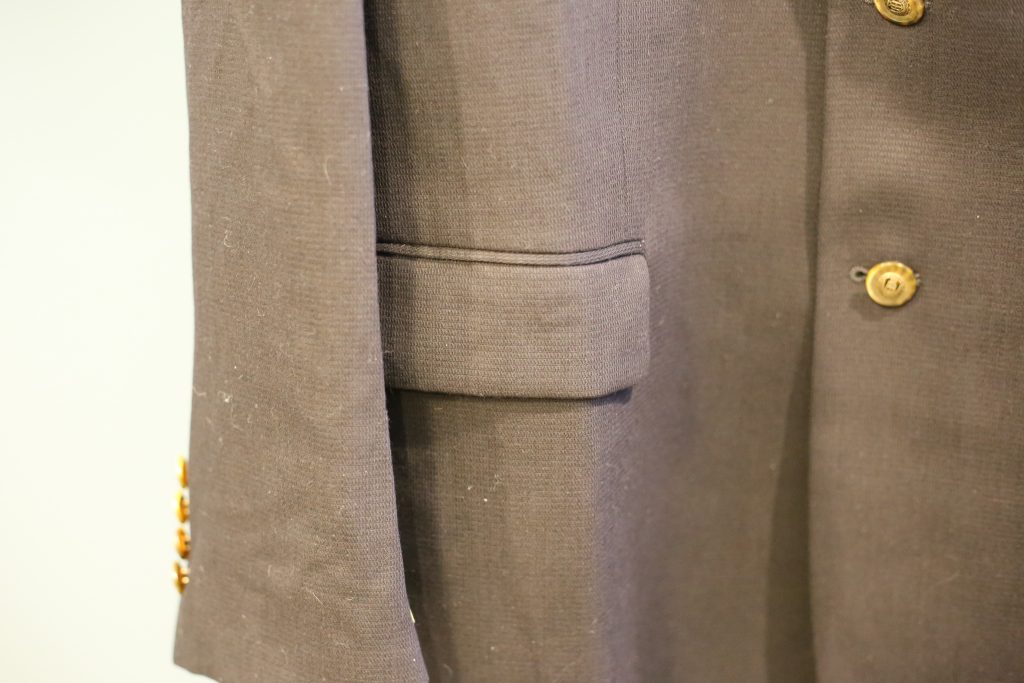
We have some more welt pockets with flaps, some gawd-awful buttons, and rounded edges on the front sections of the blazer. My blazer also has rounded front edges, and it’s pretty classic. You will also notice if you look closely, two long vertical darts just above the pockets. The McCall’s blazer also has these type of darts to add shaping to the bust and waist, and it is details like this that give you a close-fitting blazer that looks polished and tailored.
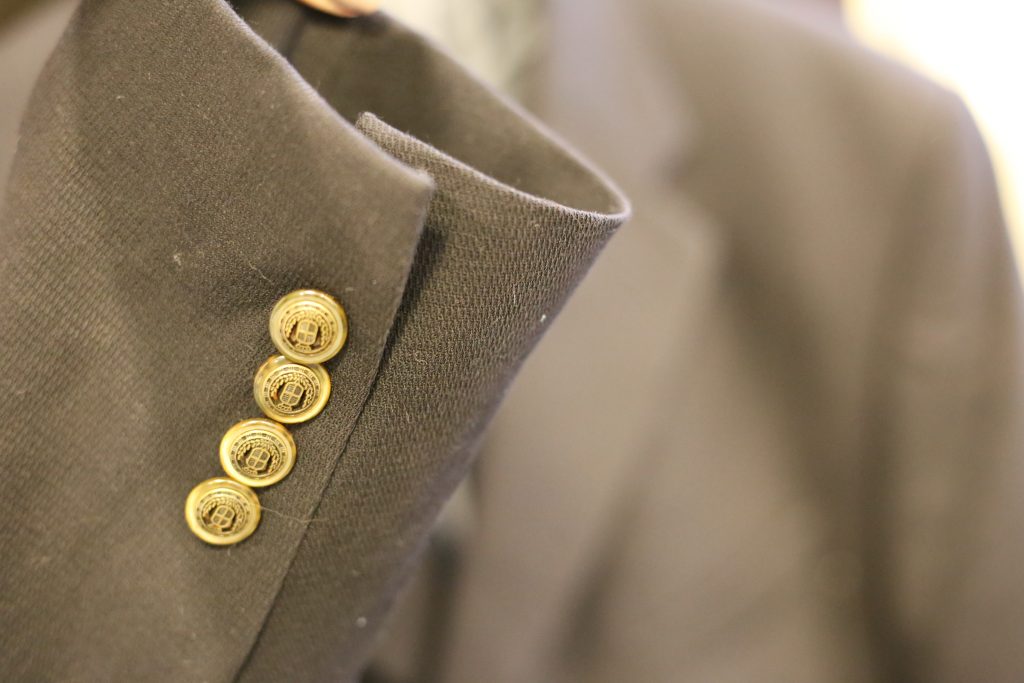
This jacket has sleeve vents with buttons, and again this is pretty classic. My McCall’s blazer does not have sleeve vents, but if you decide you want to put them in there are plenty of internet resources! Pattern Scissors Cloth has a nice photo tutorial here (and also check out her free pattern while you are on her site!!), and the lovely Diane Deziel has a Youtube tutorial here (also check out her zip fly tutorial – genius!).
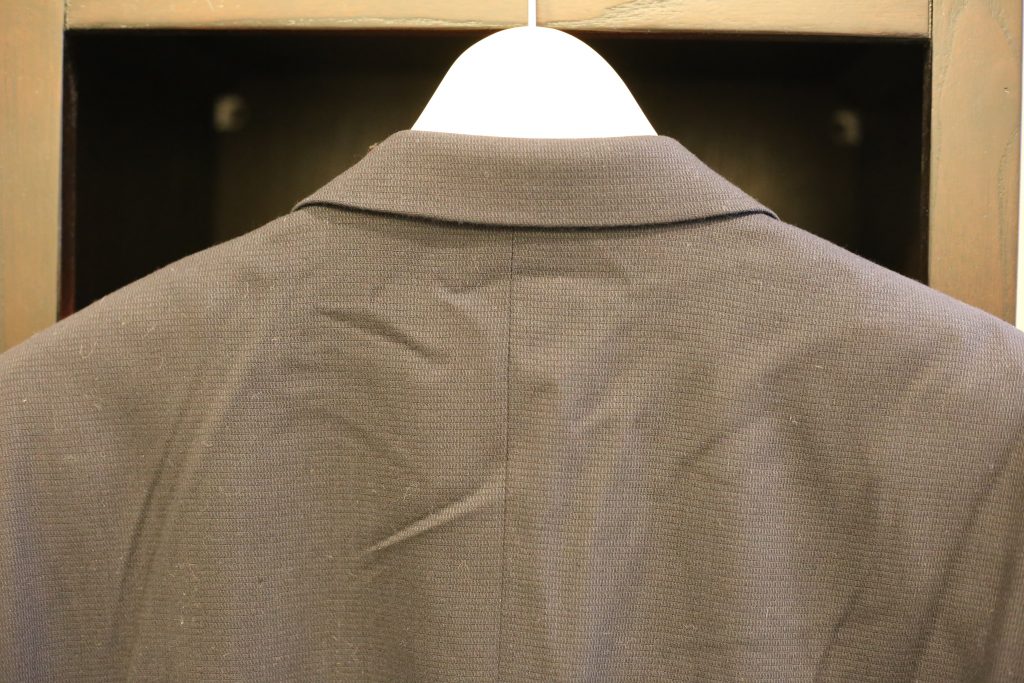
K, next. Taking a look at the back of the jacket, you will see the nice crisp collar and the seam down centre back. At the bottom of the back, there is a double vent.
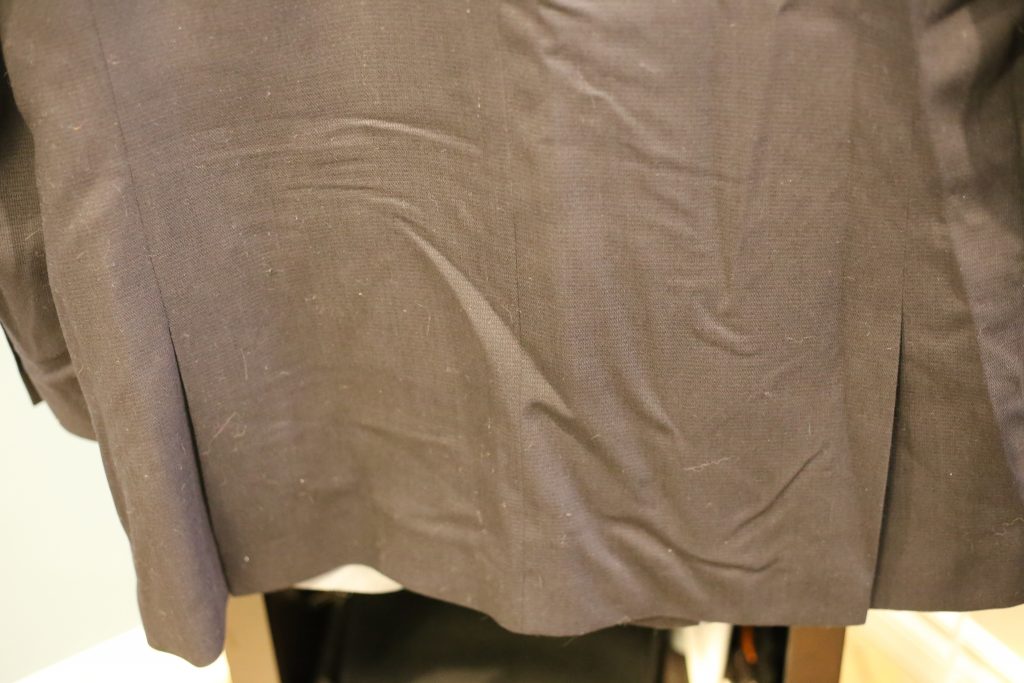
Again, the McCall’s blazer does not have either a single or double vent at the back and tbh, if it did I would have taken them out. I have a prominent butt, and the few vented jackets I have stick out like tail feathers – not a pretty look. I prefer the back of the jacket to be sleek and draw as little attention to my behind as possible. (General life goal for me btw; JLo and KK be damned.)
Now here’s something I love about men’s blazers: inner pockets!!
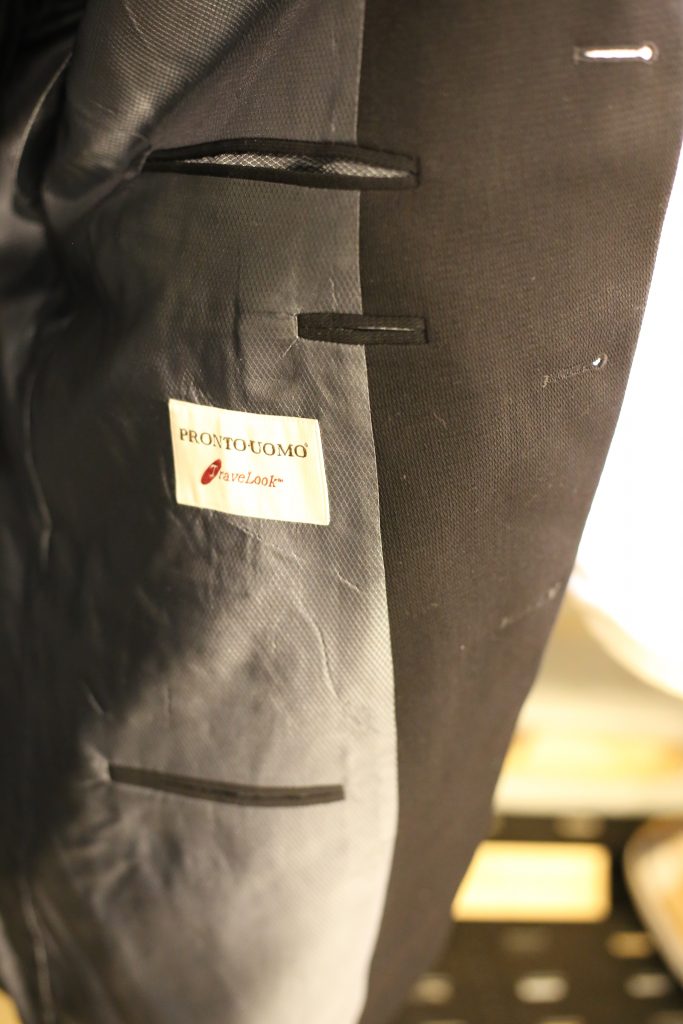

Most (all?) women’s blazers do not have inner pockets. I don’t know if it’s ’cause we have purses, or ’cause we don’t want little bulges on top of our other little bulges, but either way I see the logic. That being said, I’m most definitely putting inner pockets in my next roomy winter coat – and maybe I’ll even put in one with a zipper.
Okay, last set of pics before we cut this sucker open:
Pretty polished from the outside, don’t you think? And now the moment of truth: the guts!!
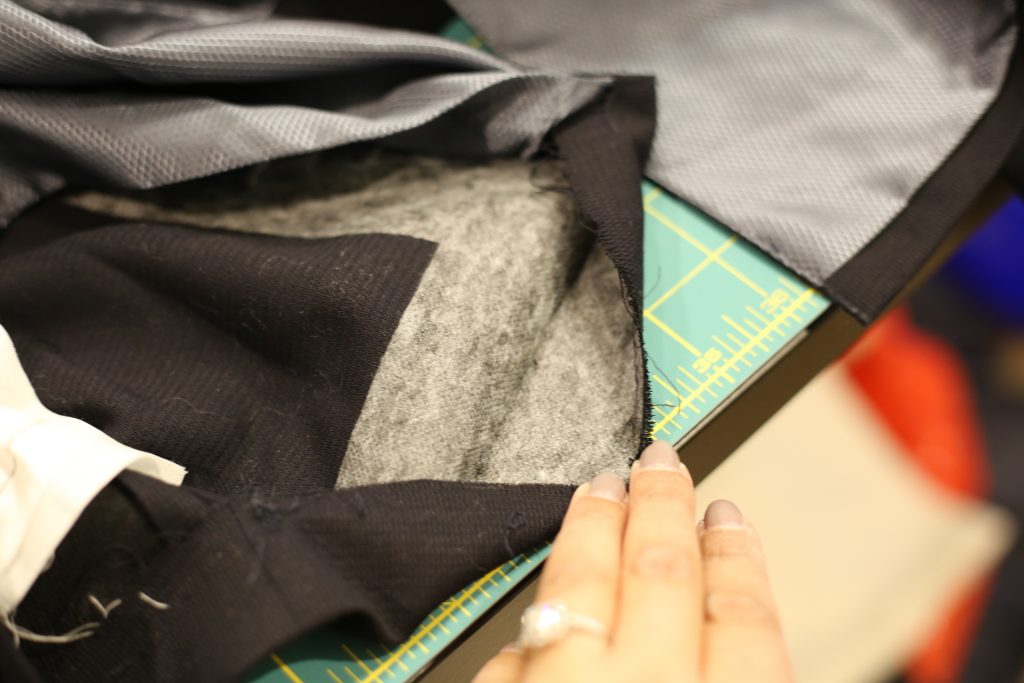
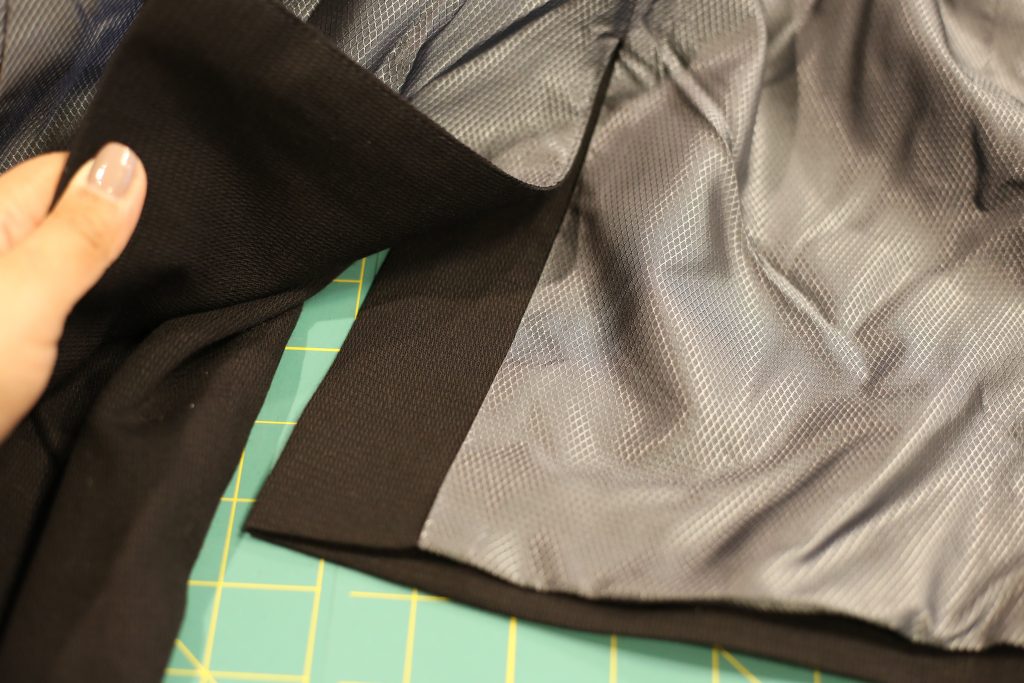
Above is the lower hem of the garment once the lining is opened up. As you can see, the entire hem allowance has been interfaced with fusible. This provides stability to the hem as well as prevents press marks showing on the outside. Interfacing the sleeve and jacket hems is a fairly common and widely recommended step in many pattern instructions and tutorials.
Guys and gals, pay attention. Now it gets really interesting.
I was familiar with the theory of couture techniques for jackets, but I didn’t expect to see a lot of these techniques in a fairly inexpensive store-bought garment. I was wrong.
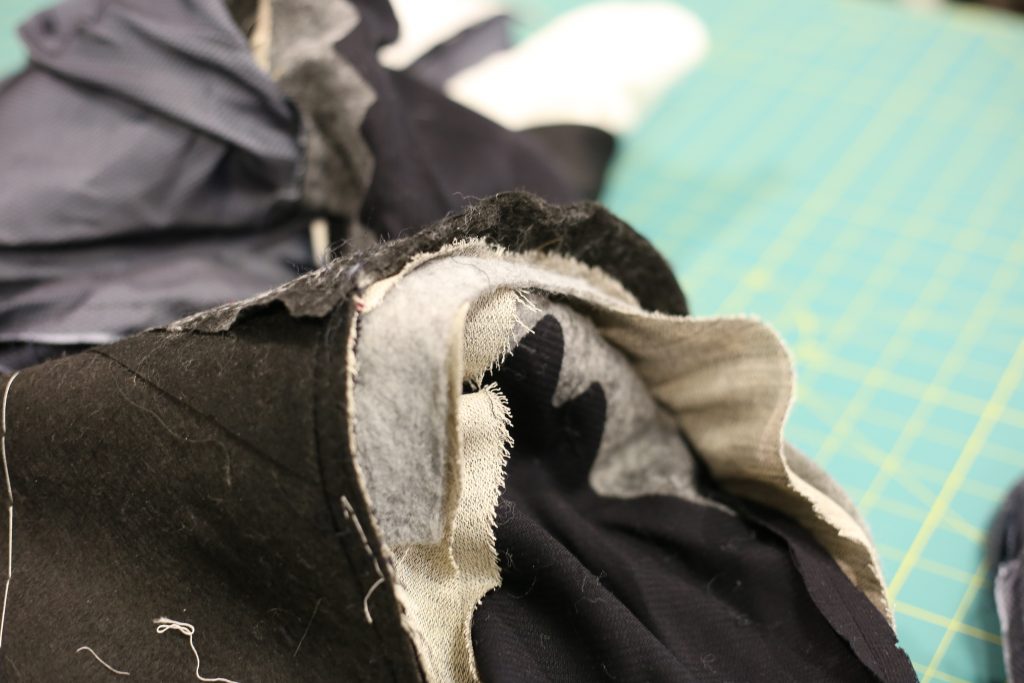
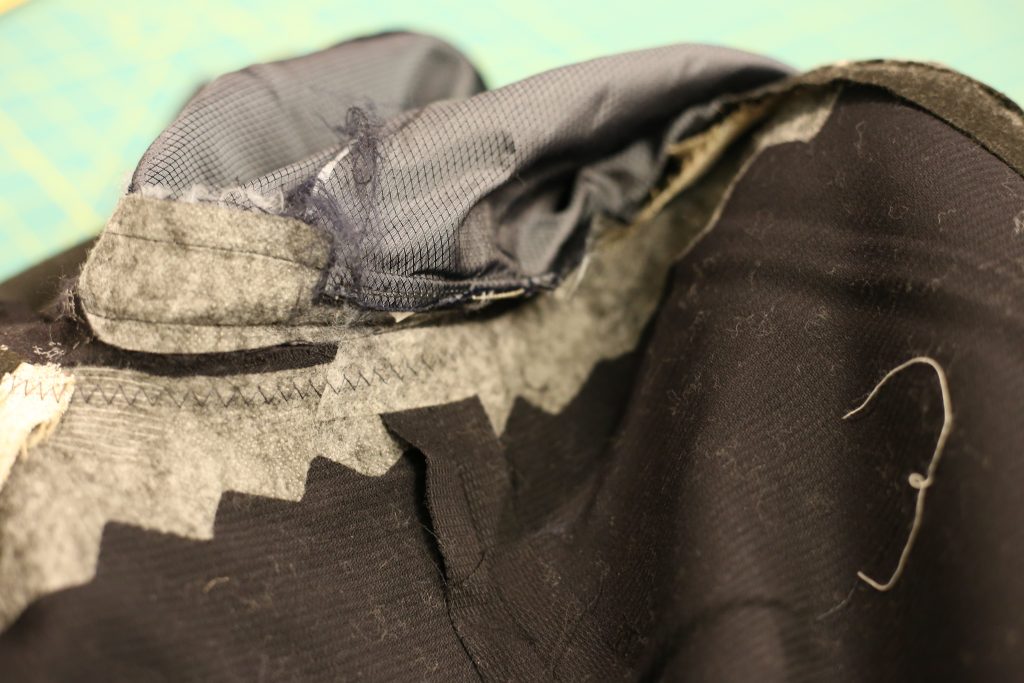
Above is a photo of one shoulder and sleeve cap. Notice that we have, from bottom to top: fusible interfacing, two layers of hair canvas for shoulder shaping, a sleeve head made of something soft (flannel or lambswool), some more hair canvas or possibly muslin (which might be the lower piece of hair canvas sewn on a fold), and then a felt shoulder pad.
I actually was slightly overwhelmed and then in awe of this shoulder construction when I opened up the garment. Really, who would have expected them to put so much effort into a garment made of 100% polyester? I could write an entire blog post just about shoulder construction…but lots of people already have, so just go check out some cool posts:
https://cloningcouture.com/tag/chanel-jacket/
http://www.burdastyle.com/techniques/attach-jacket-shoulder-foundations
http://www.threadsmagazine.com/item/4976/armani-jackets-the-inside-story/page/all
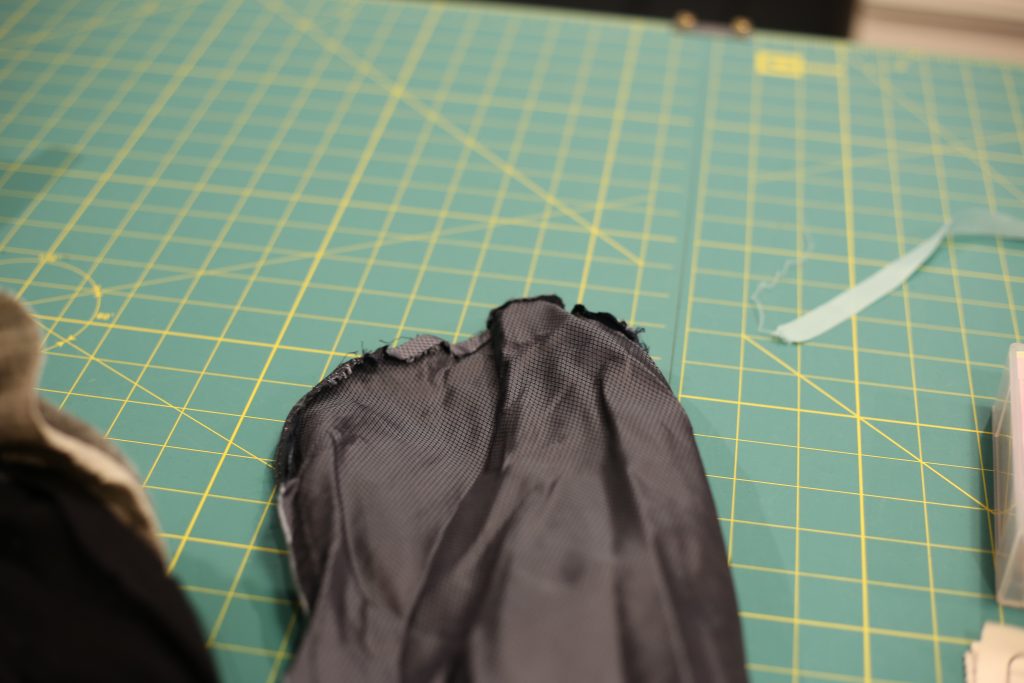
The lining was constructed without attaching the sleeves, and then the lining was sewn into the jacket and attached at the armholes. The sleeve linings were added afterwards and hand-stitched to the rest of the lining. Again, I was REALLY surprised to see this. The McCall’s pattern also recommends doing the same thing, but I’ve always attached the sleeves to the lining prior to inserting it into the garment so I stuck with that method. This method would have definitely taken longer. Granted, this method would ensure less movement of the lining and would allow you to attach the sleeve lining to the sleeve very securely.

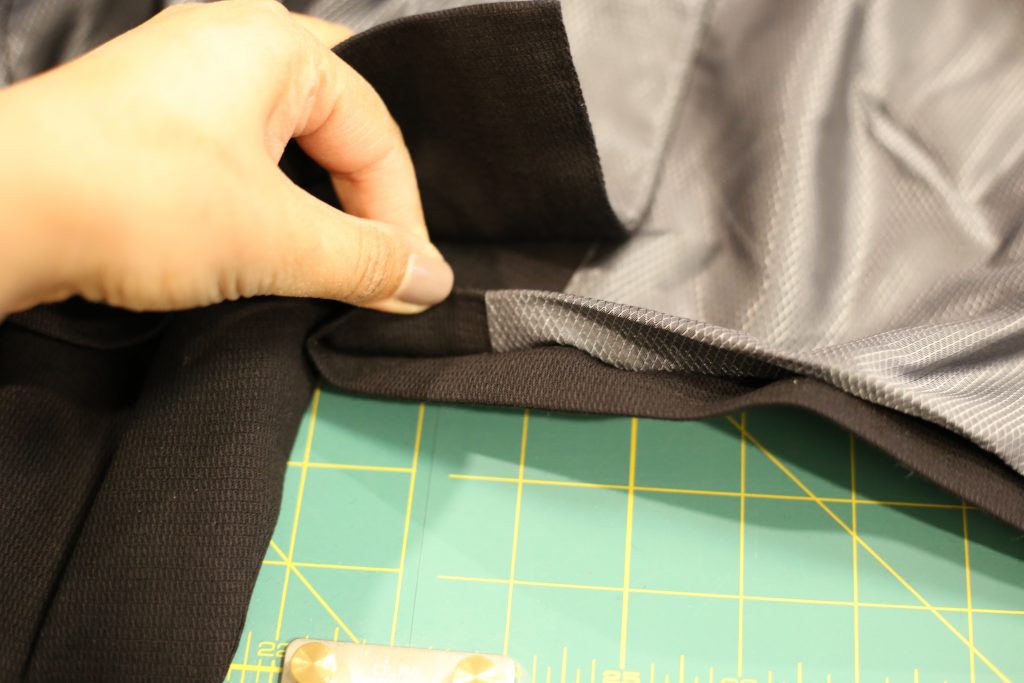
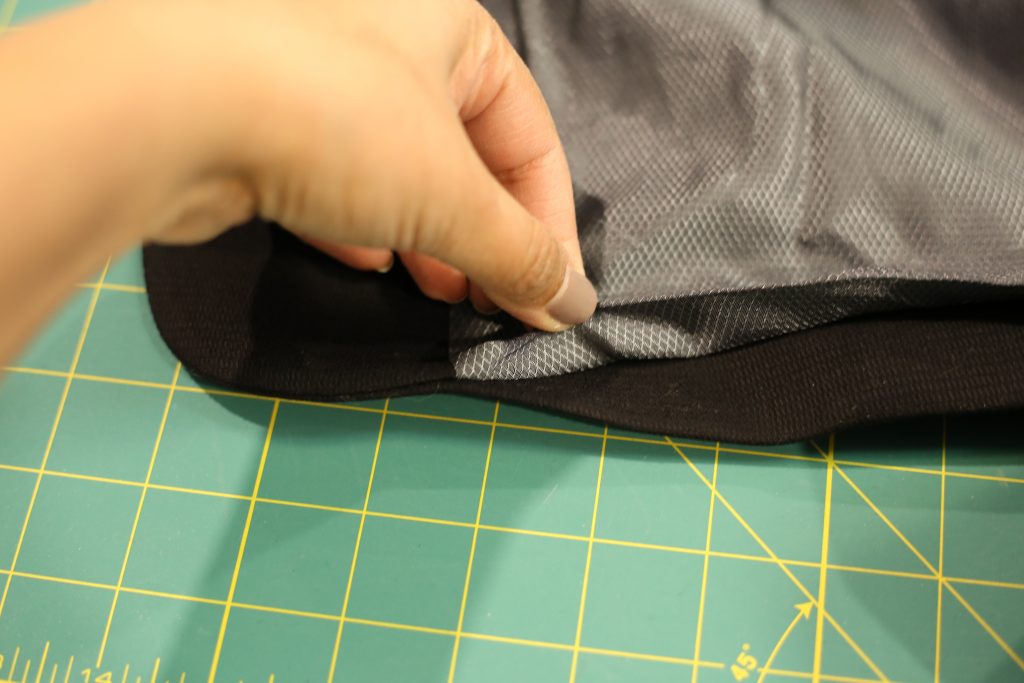
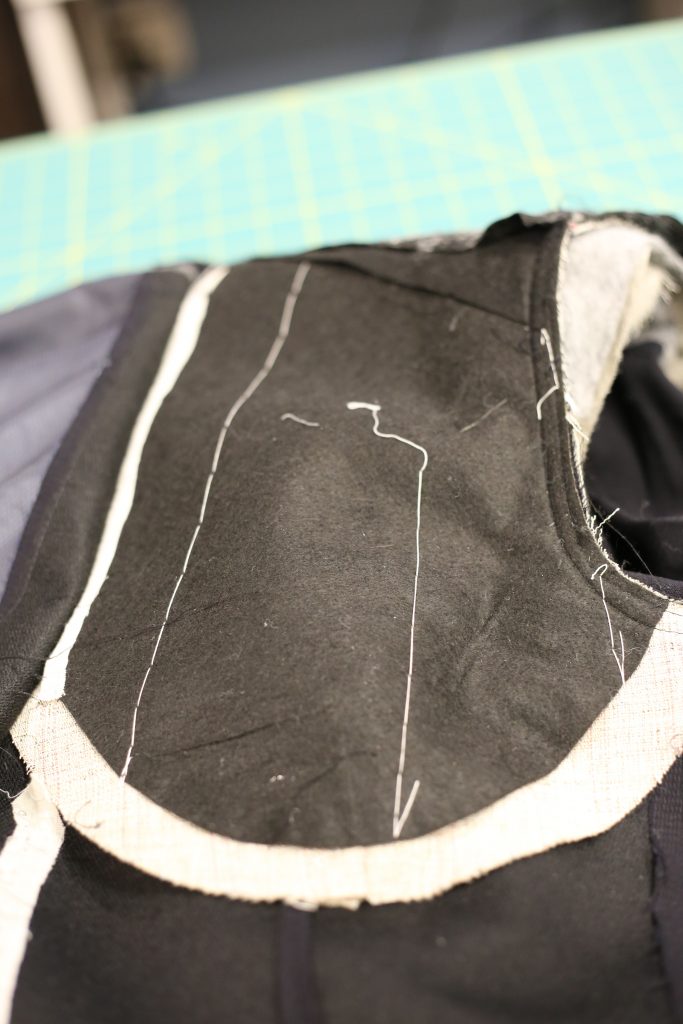
What you are seeing above is the bottom front of the jacket – the curved part. On the left is the front facing attached to the lining, and on the right is the outer jacket. Along the seam there is some fusible interfacing, and just to the right of that you see two long rectangular white strips. This is known as “taping” the jacket – yet another step I skipped on my blazer. I was roaming around the internet a few years ago and I stumbled across this repository from the University of Nebraska, which contains some incredible articles about garment making! Here’s the one on taping and pad-stitching. When you are on the site, if you search the author Jane Spence, you will find three other articles on Lining a Jacket, a Trial Muslin, and some fashion history. I love higher education.
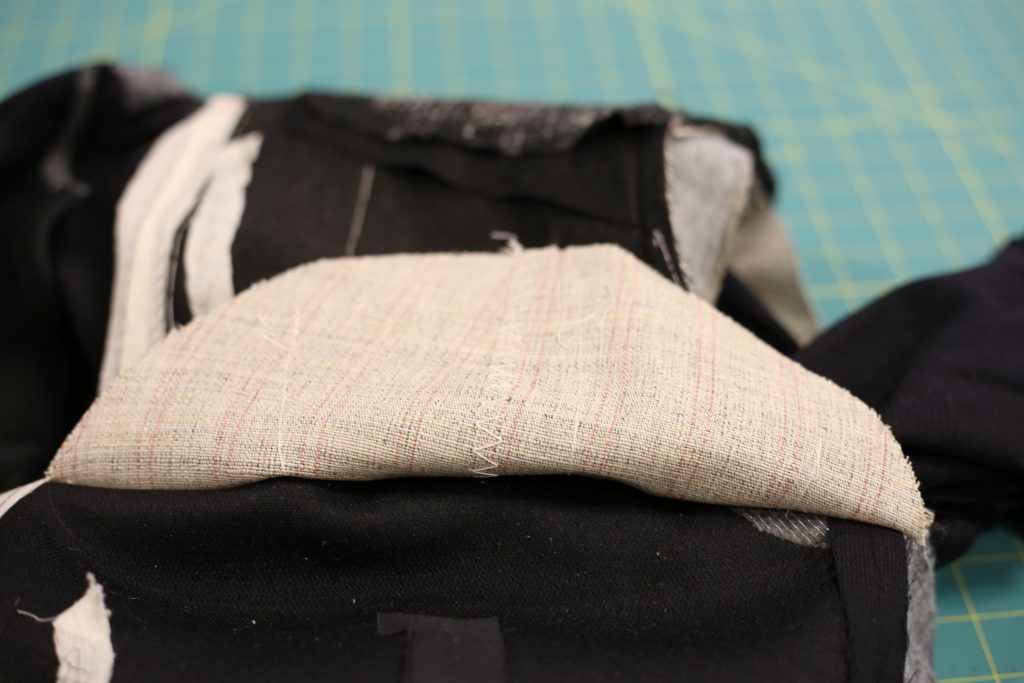
Next, we have the front chest area and shoulder of the jacket. What you see in the picture below is the padding that fills out the hollow of the chest (from the shoulder to the full part of the chest). Of course, not every man would need this much padding in this area. This is one of the things that gets customized if you ever have a bespoke suit made. I once found this very cool series on YouTube that showed a tailor on Savile Row making a blazer. I’ve misplaced the link but if I find it I’ll post it here!
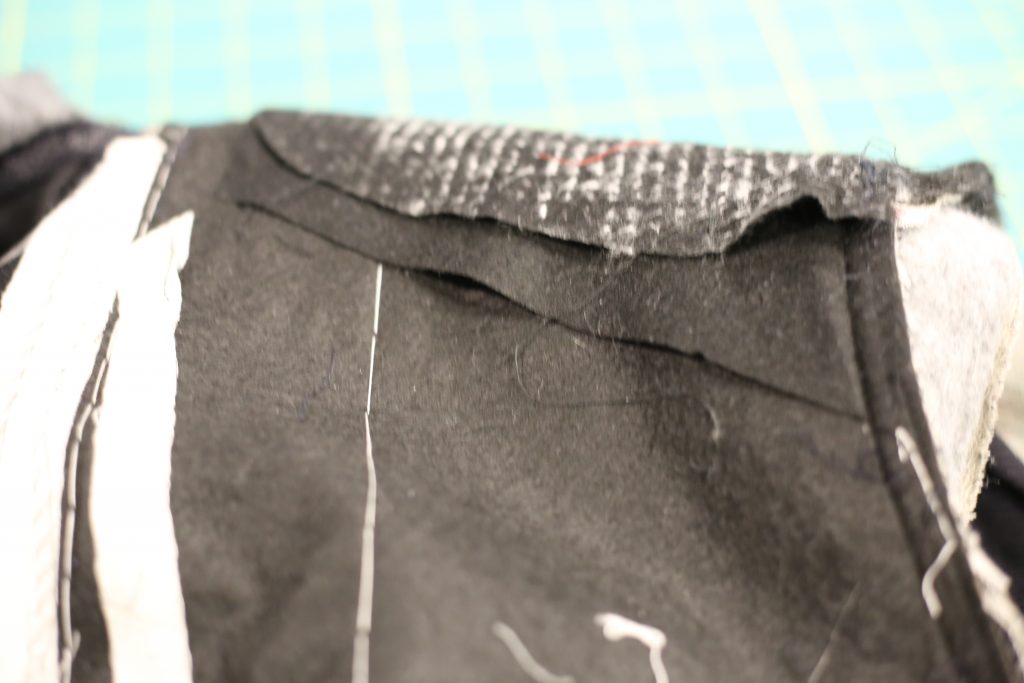
The last thing we will look at is the collar. This photo shows the back of the jacket, right at the top where the jacket meets the collar. You can see they have reinforced it with interfacing.
The under collar is not the suit fabric. It is what appears to be felt. It is top-stitched to the upper collar using a zig zag stitch everywhere except at the notch. This is a pretty different construction than I am using, but I can see it allowing more control.
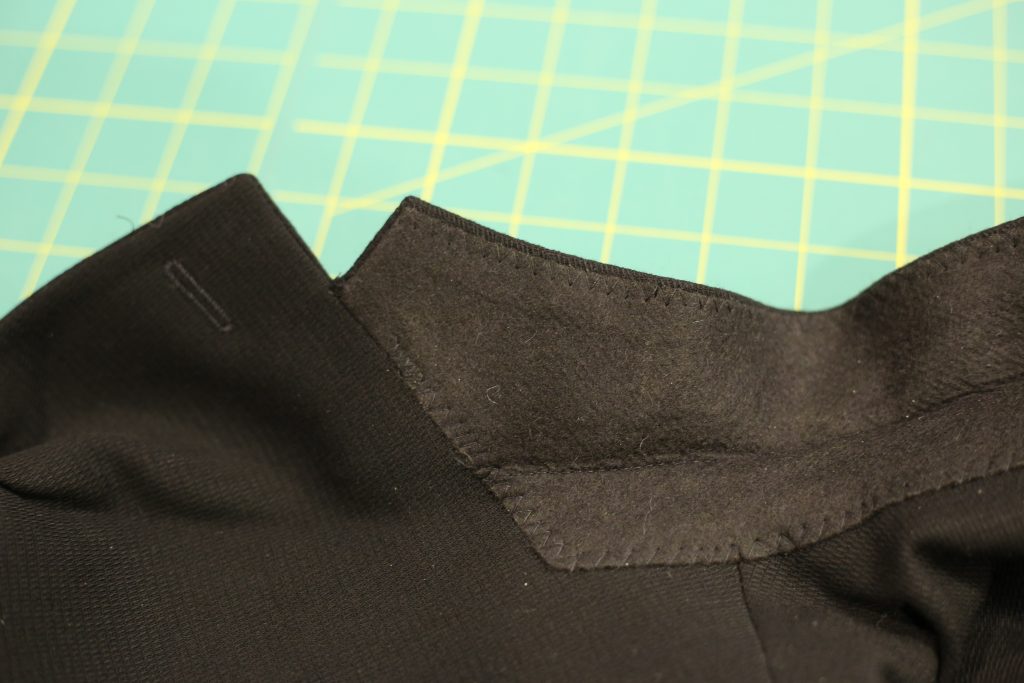
Here’s the under collar pulled back at the notch. You can see the seam allowances of the upper collar tucked towards the inside, and I suspect they attached the upper collar to the jacket first and then applied the under collar afterwards. Again, very different construction from my blazer but it allowed them to get a really nice sharp notch.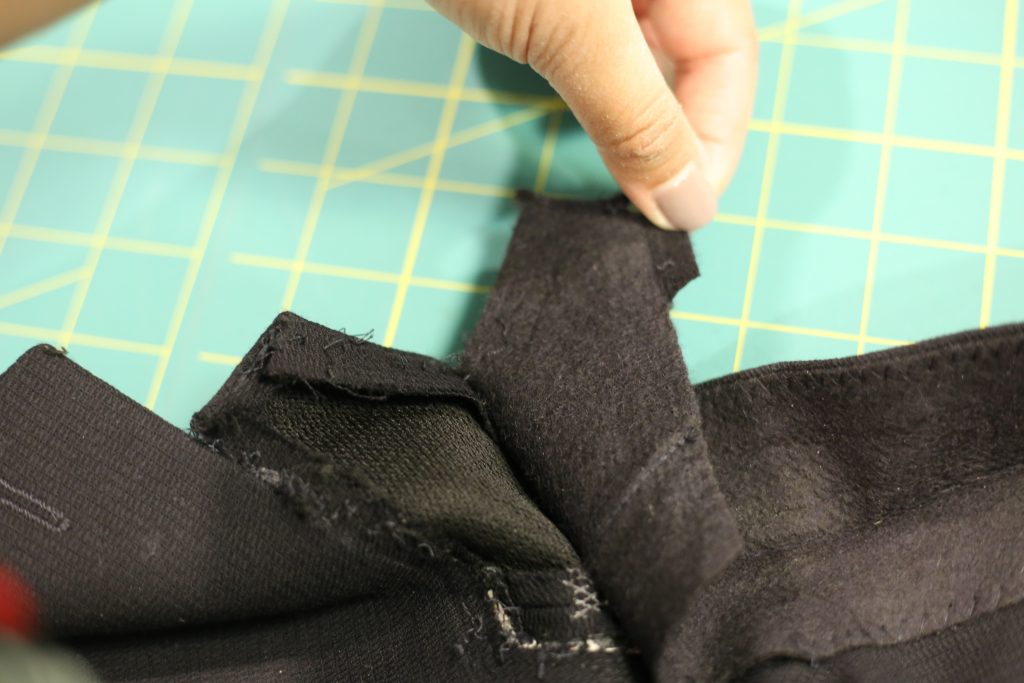
The men’s blazer has been demystified. I hope you enjoyed taking a closer look at ready to wear construction. I enjoyed this too and will probably do it again with some other tailored garments!
My blazer is nearly complete; part 3 will be posted in a matter of days! Is anyone out there making a blazer? I’d love to know what pattern you are using and what couture techniques you have decided to tackle.