
Wow! It’s been a long time coming, but here it is – my first blog post!!! I’m so excited to be able to share my passion with all of you out there and I hope that this blog will someday inspire you, motivate you or teach you something you didn’t know.
So let’s get to it. Today I want to share a recently completed project that I made for a friend. It is a blog of “firsts” – first garment I ever made by copying an existing garment, first garment made from boiled wool, first photos with my new camera!
I started by tracing the sections of the existing coat using tracing paper. The “sections” were defined by the seamlines, and I also copied pleat locations. I use medical exam room paper for patternmaking because it’s cheap and effective, but there are many types of pattern paper out there. Once I was satisfied that I’d traced each section accurately, I added seam allowance and ensured that the adjoining edges were the same length. I made minor adjustments where necessary.
Next, I made a muslin. A muslin is a trial version of your garment made in cheap cotton fabric (also called muslin) or a similar weight of fabric to your fashion fabric. Lladybird is one of my favourite bloggers and she talks a lot about how to make and fit muslins on her site. Trust me – it is way better to screw up sizing, fitting adjustments or to just decide you hate a pattern by doing it in cheap fabric rather than in your expensive fashion fabric!
I did a fitting with the client on the first muslin and realized I had overlooked one super crucial step – I had forgotten to have her try on the original jacket for me. Turns out it was several sizes too small (she recently had a beautiful baby), so I had to remake a brand new muslin after sizing up the pattern by about 2-3 sizes. Whoops. But let me tell you, these are mistakes you only make once!!
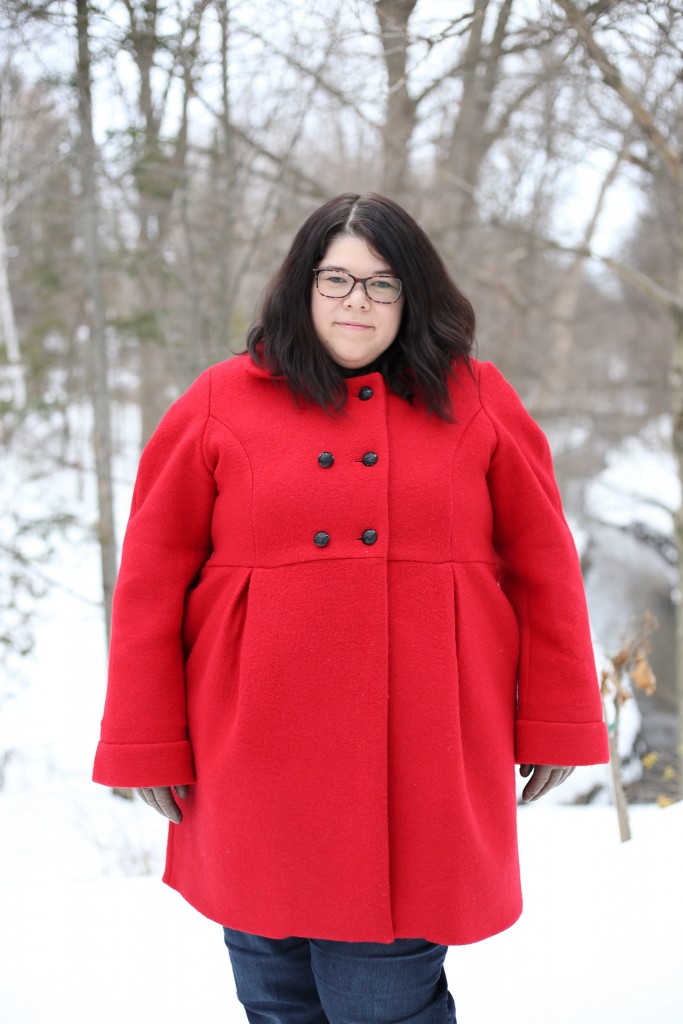
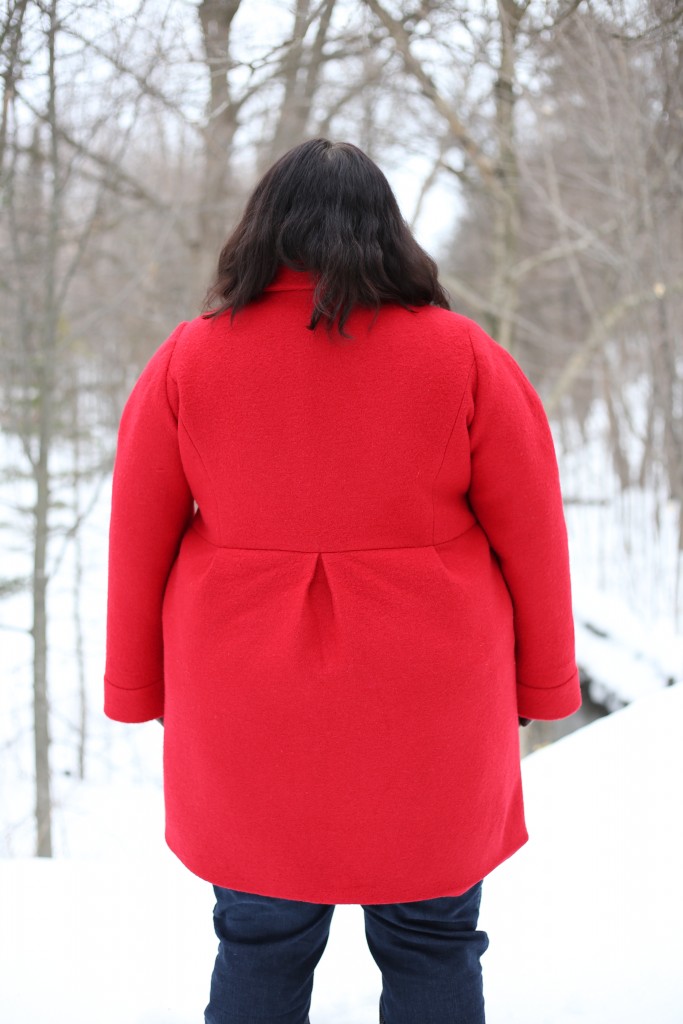
The next fitting went quite well, and after a few adjustments to sleeve length and shoulders I was ready to cut into the wool.
Boiled wool is a fabulous fabric for outerwear. It is exactly what it sounds like – the wool is soaked in hot water and that causes it to shrink and become more dense and felted. Boiled wool is lightweight but very warm, breathable yet windproof at the same time. Perfect Canada-winter material!
Boiled wool is notorious for stretching over time, so I chose to use fusible interfacing on the whole thing. I took it to my local drycleaner and they used their large press to fuse the interfacing to the 3.5 metres of fabric for a pretty reasonable $15. If I had done this at home it would have taken probably over an hour, so it was worth the extra cost.
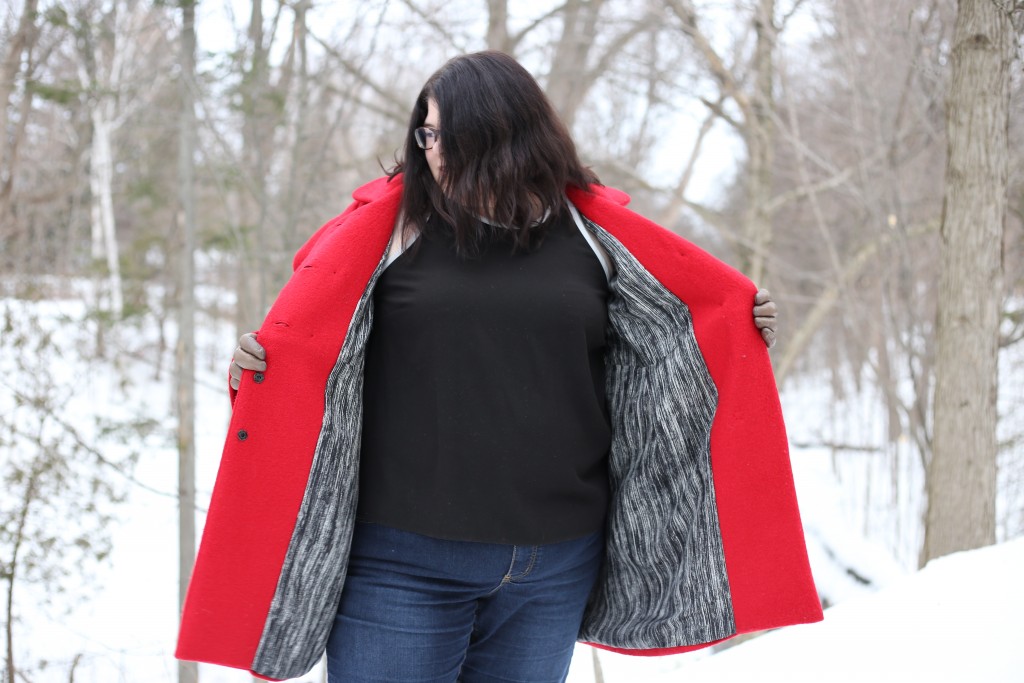
Skip forward several weeks (I don’t always have time to sew every day) and two fittings, and I was finally ready to put in the lining! I chose a funky black and white striped polyester lining. I would have preferred to use a Bemberg as the poly isn’t breathable, but my local store had no funky Bemberg prints.
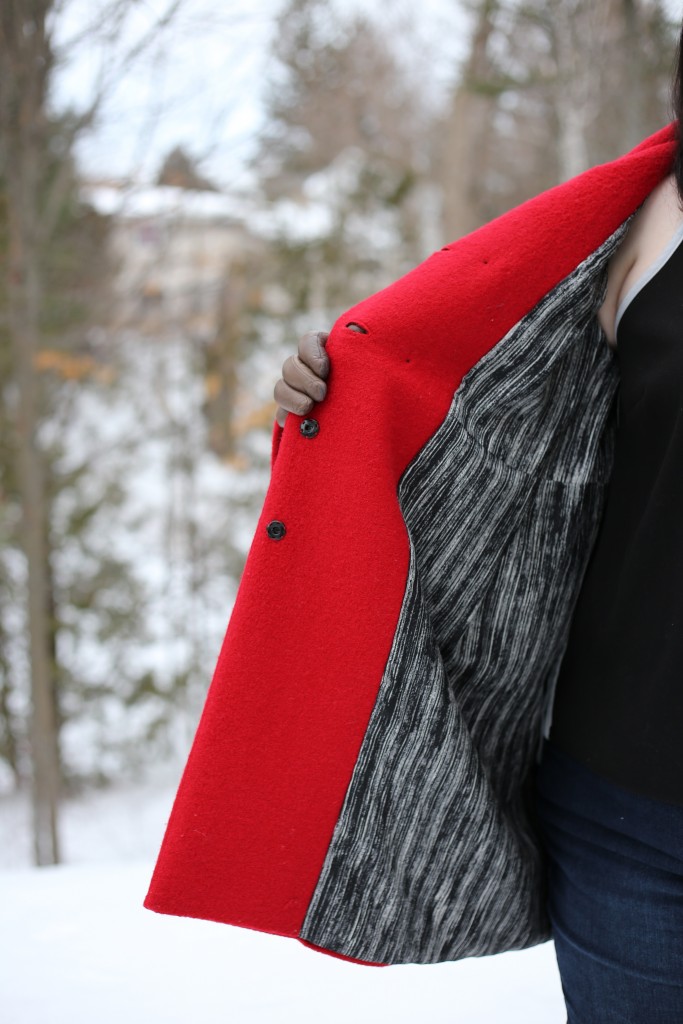
I ended up reusing the buttons from the original coat, but I also added two snaps to the bottom half to keep the coat from flapping open in our lovely -20C weather.
And there you have it – my first boiled wool coat! Next time I’ll take pics of the construction process, but this time around I didn’t actually own a camera until the very end of the garment. Yes I know – I could have taken pics on my phone. But, I really want the images in my blog to be beautiful and professional (or at least they will be, once I figure out all the cool features of my camera). Sorry peeps.


If you have any questions (about the coat, the photos, why I live in a friggin tundra) please contact me. I love feedback!
The coat looks amazing. What a nice fit and the finishing is gorgeous. Congrats